

Scheduled Shell Script for Automated AWS Resource Usage Reporting


What does this project do ?
Running the AWS Resource Tracker script offers users a convenient way to access a comprehensive list of assets associated with their AWS account, including S3 buckets, EC2 instances, Lambda functions, and IAM users. This data serves various purposes such as auditing, inventory management, resource optimization, and security assessments.
Okay! Now let's see the blueprint for executing the project using an EC2 instance on AWS:
Provision EC2 Instance:
- Provision an EC2 instance by creating a key pair for SSH access and configuring a security group with inbound rules permitting SSH access on port 22.
Create IAM User:
Create an IAM user with appropriate permissions to access AWS resources.
Configure policies to grant necessary permissions.
EC2 Instance Setup and Configure AWS CLI:
SSH into the EC2 instance using the PEM key pair.
Install AWS CLI (Command Line Interface) on the EC2 instance.
Set up AWS CLI with the IAM user's access key and secret access key.
Write AWS Resource Tracker Script:
- Develop a script using AWS CLI commands to track resources such as S3 buckets, EC2 instances, Lambda functions, and IAM users associated with the AWS account.
Schedule Script Execution:
- Utilize cronjob to schedule the execution of the AWS resource tracker script.
Now comes the EXECUTION !
STEP 1: Provision EC2 Instance

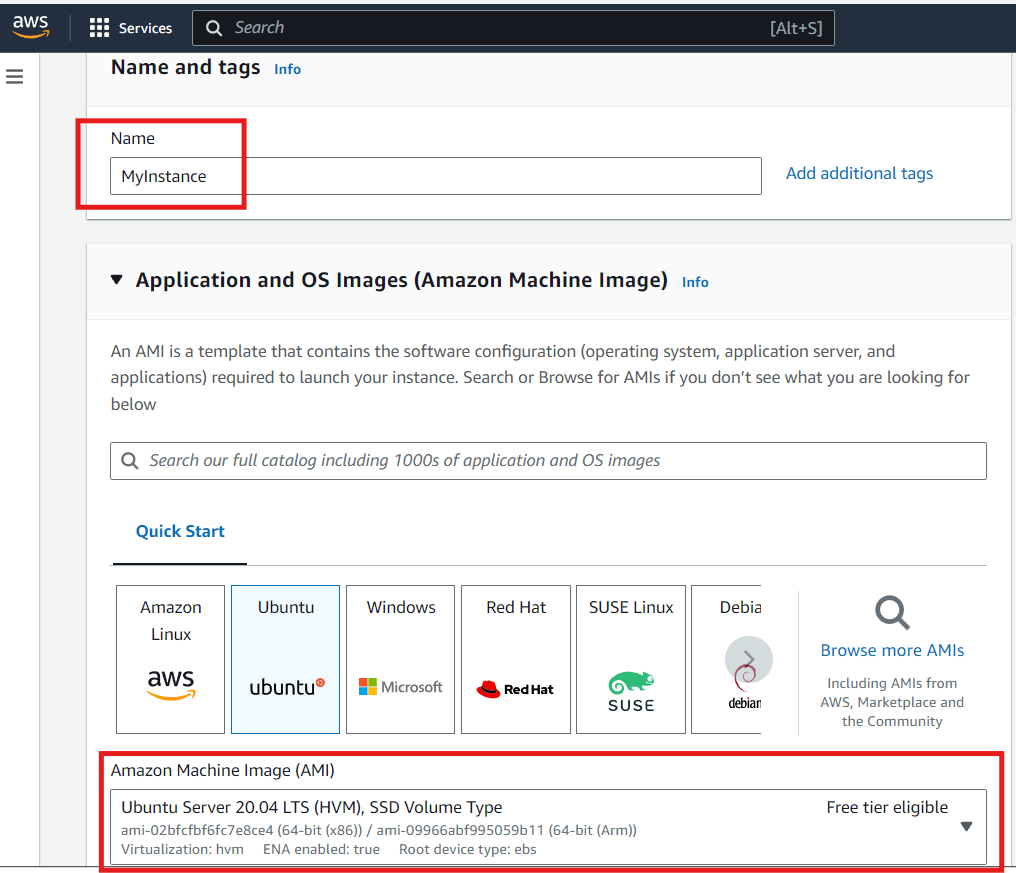
Give an appropriate name to your instance and select the AMI of your choice. In my case, I have chosen the Ubuntu Server 20.
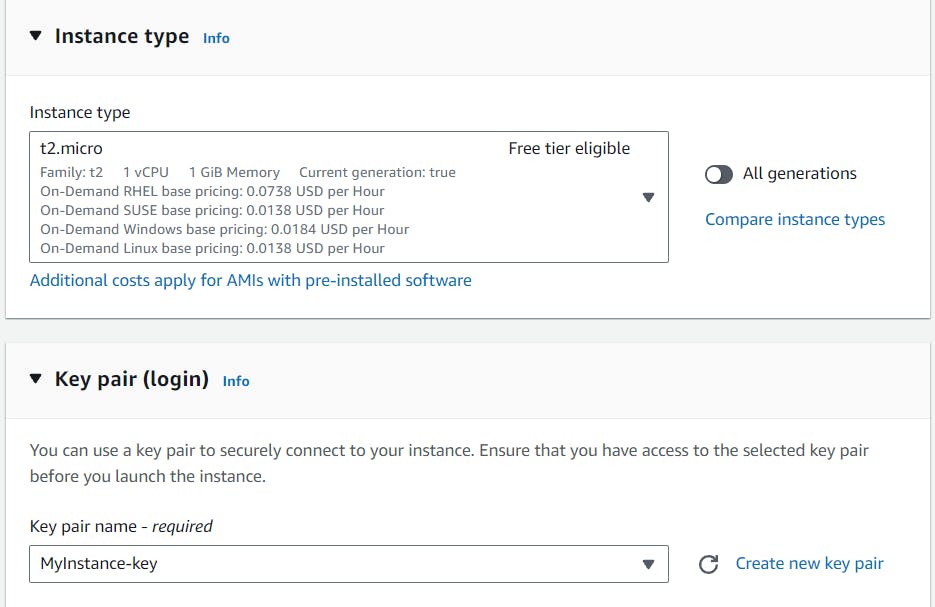
Make sure you select t2.micro, which is eligible for the free tier. Otherwise, you will be charged if you choose any other instance type not covered by the free tier.
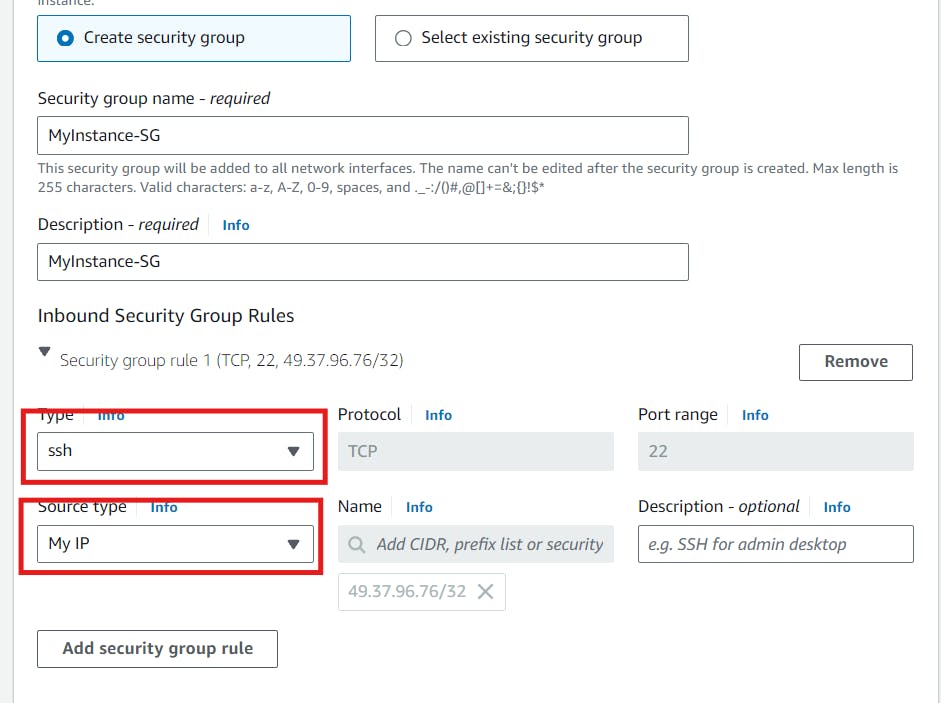
Appropriately name your security group and ensure that you allow SSH from your IP address. This way, you can SSH into the EC2 instance through your terminal.
STEP 2: Create IAM User
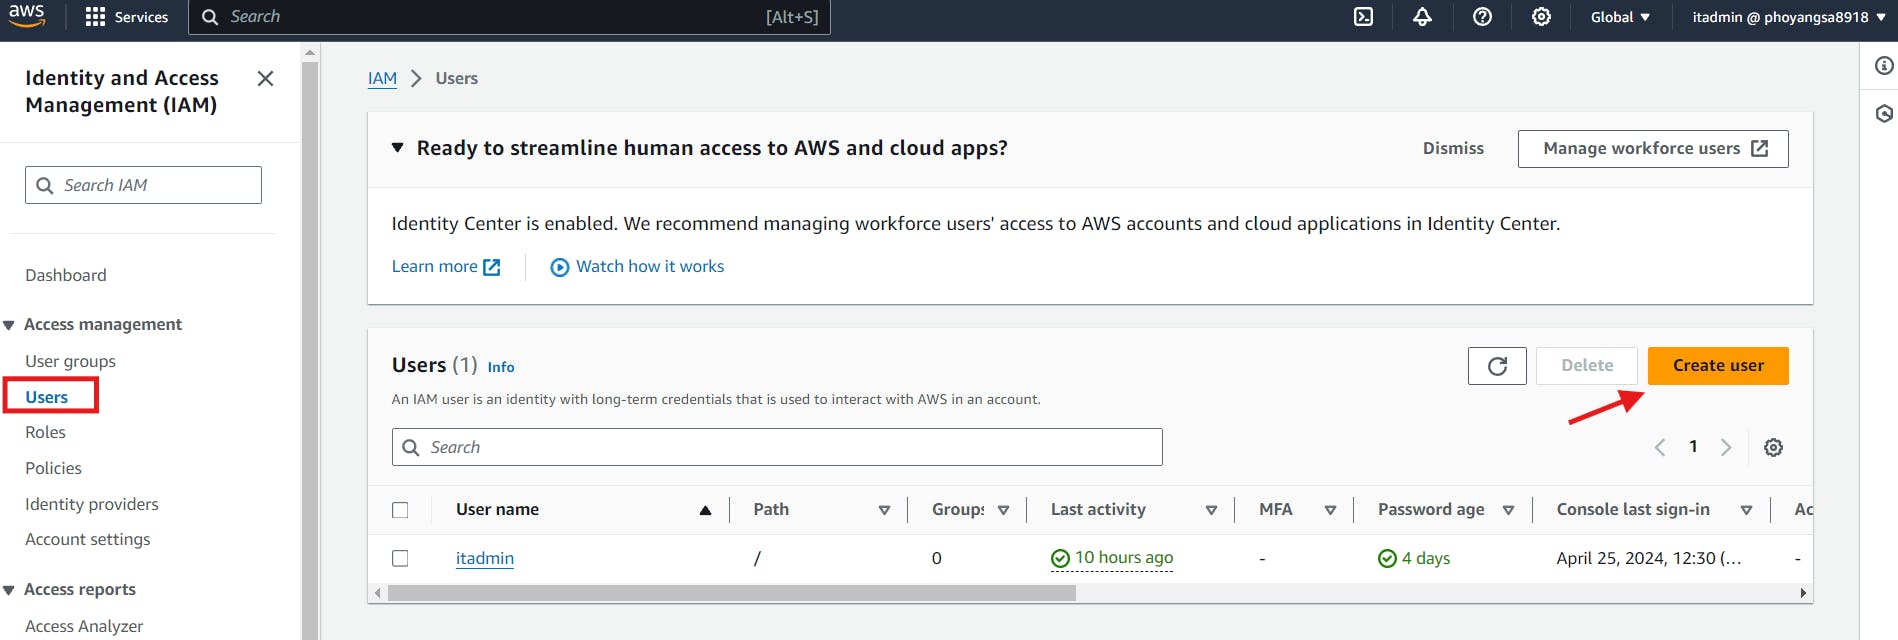
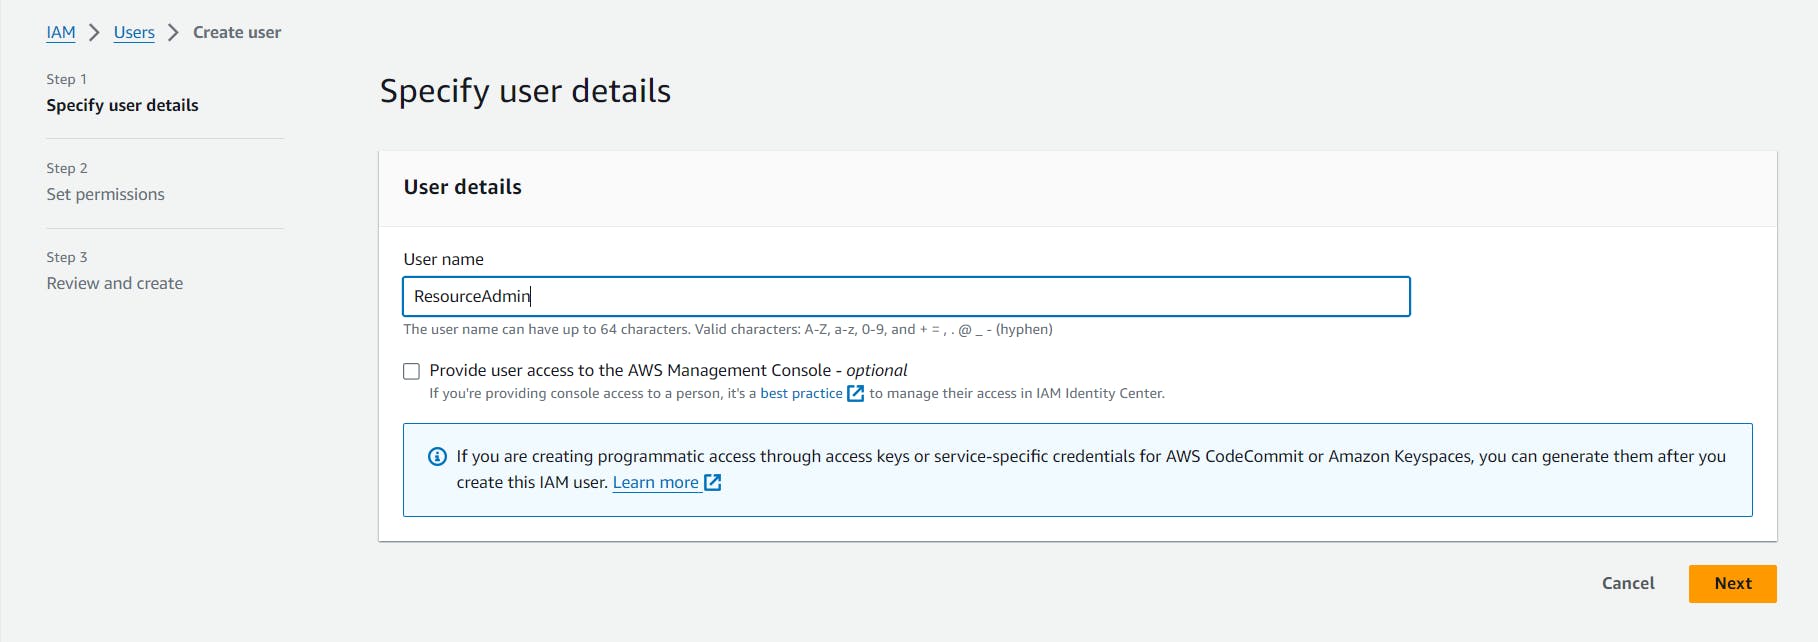
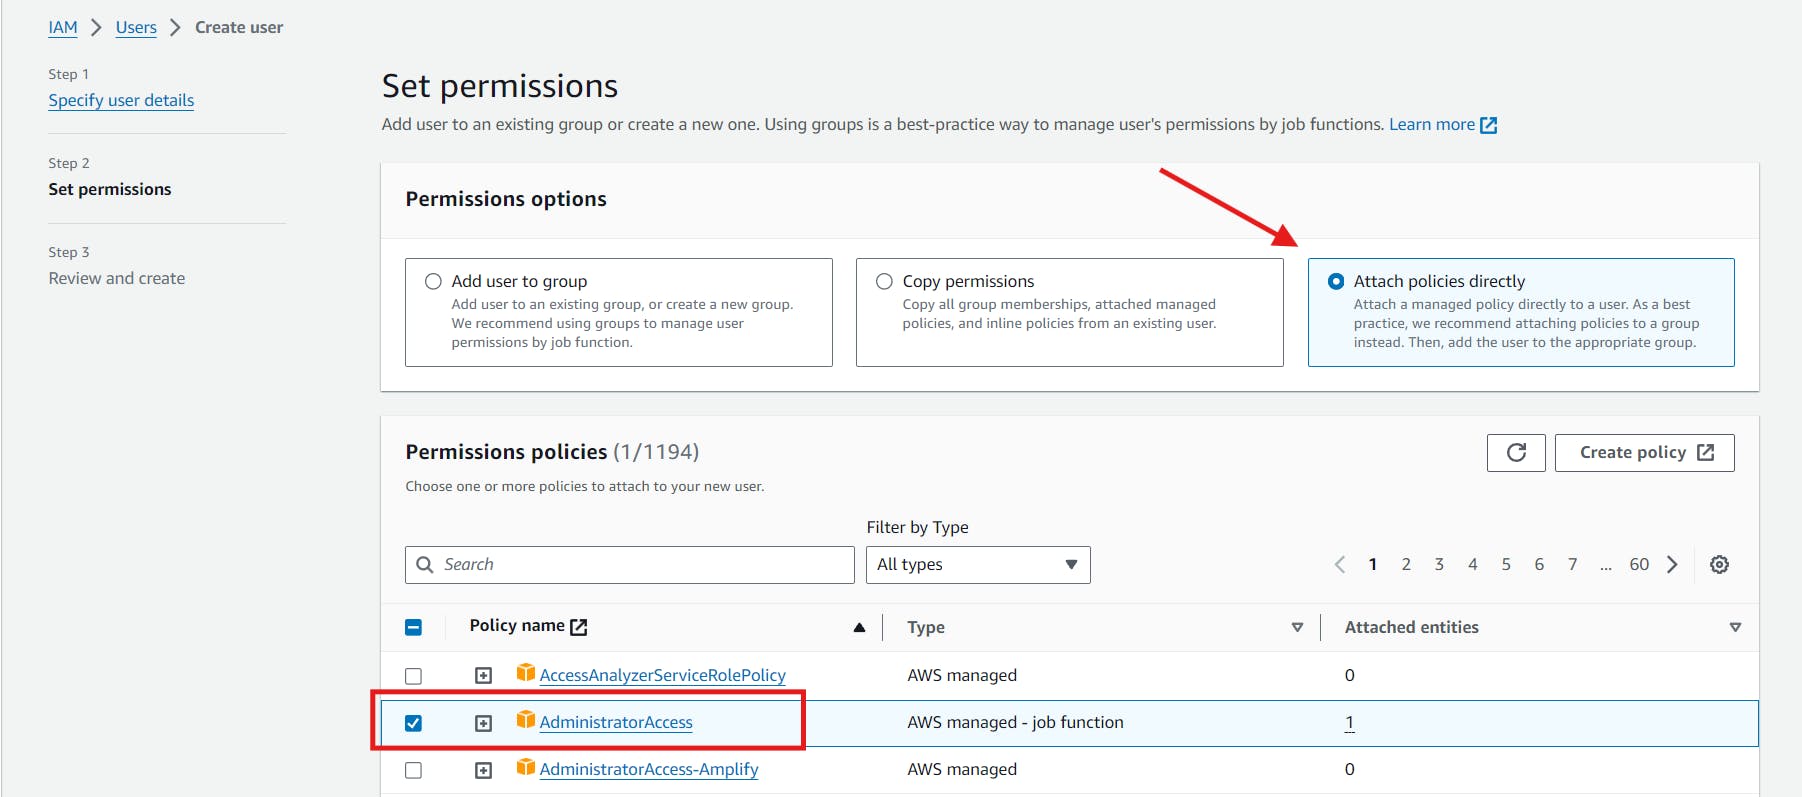
Only attach the policies that are necessary for security reasons. In my case, I have attached administrator access for convenience.
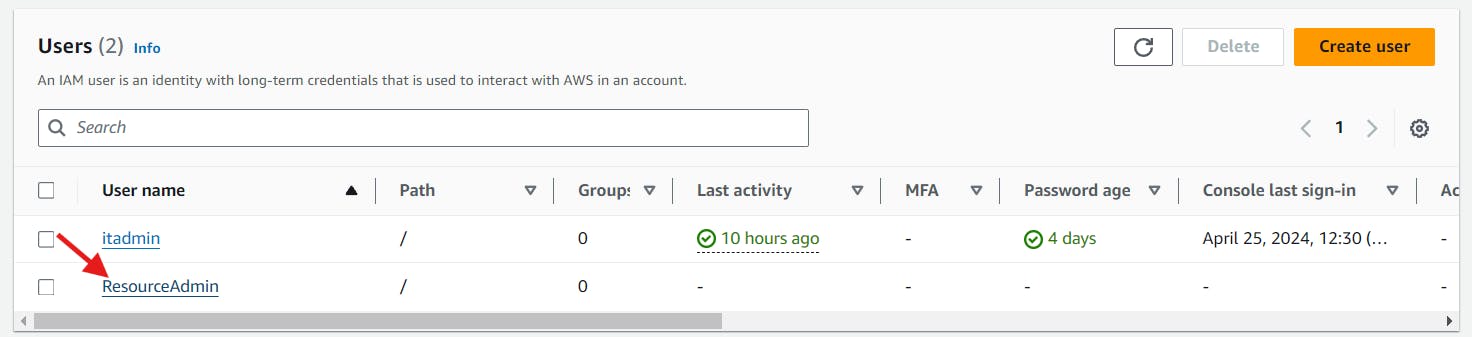
After creating, head over to your newly created user and create access keys.
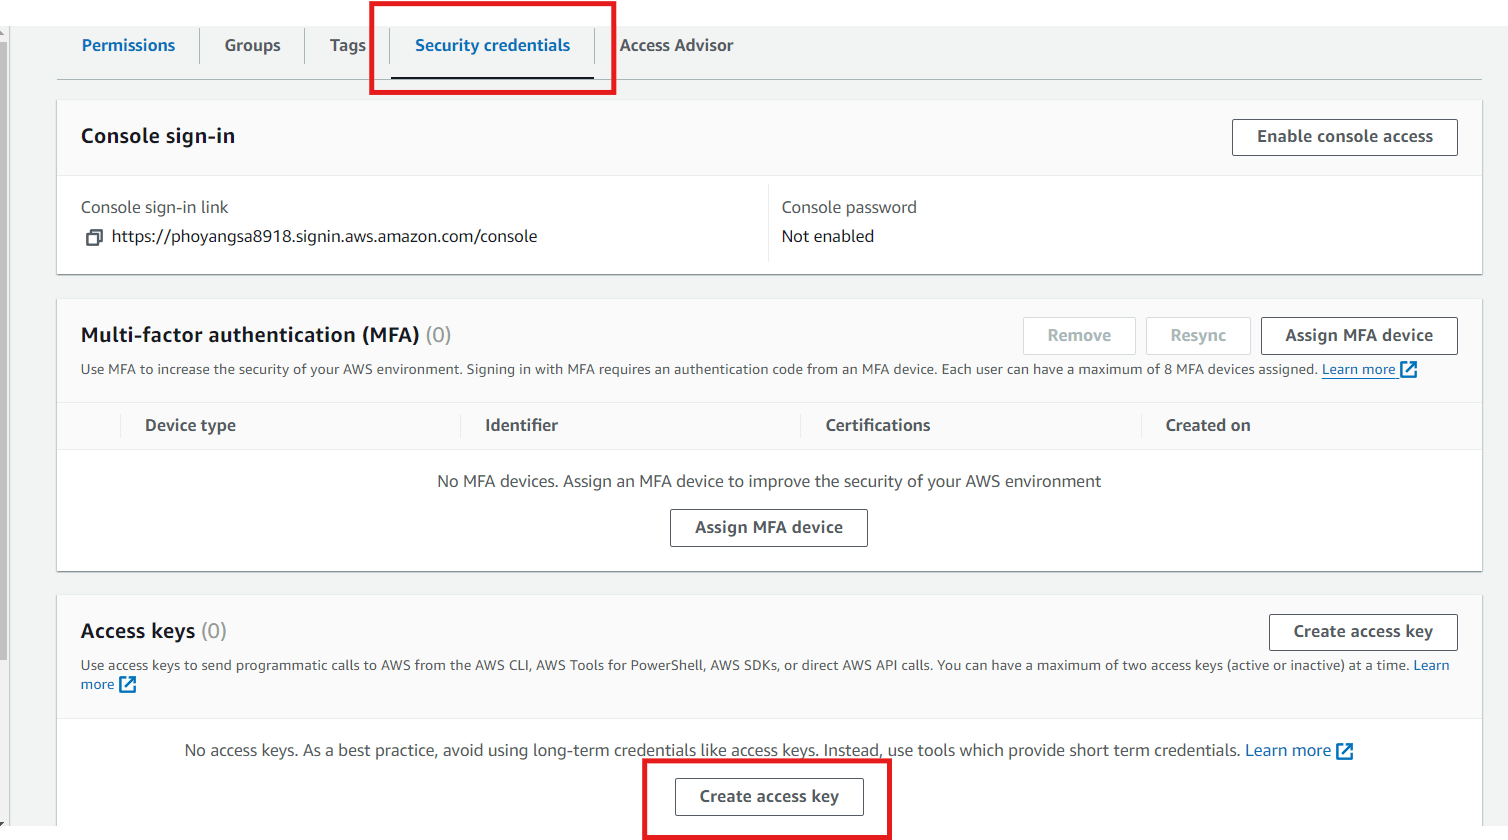

Select the purpose for using this user. I have chosen CLI because I will utilize this user to access my AWS resources using the CLI.

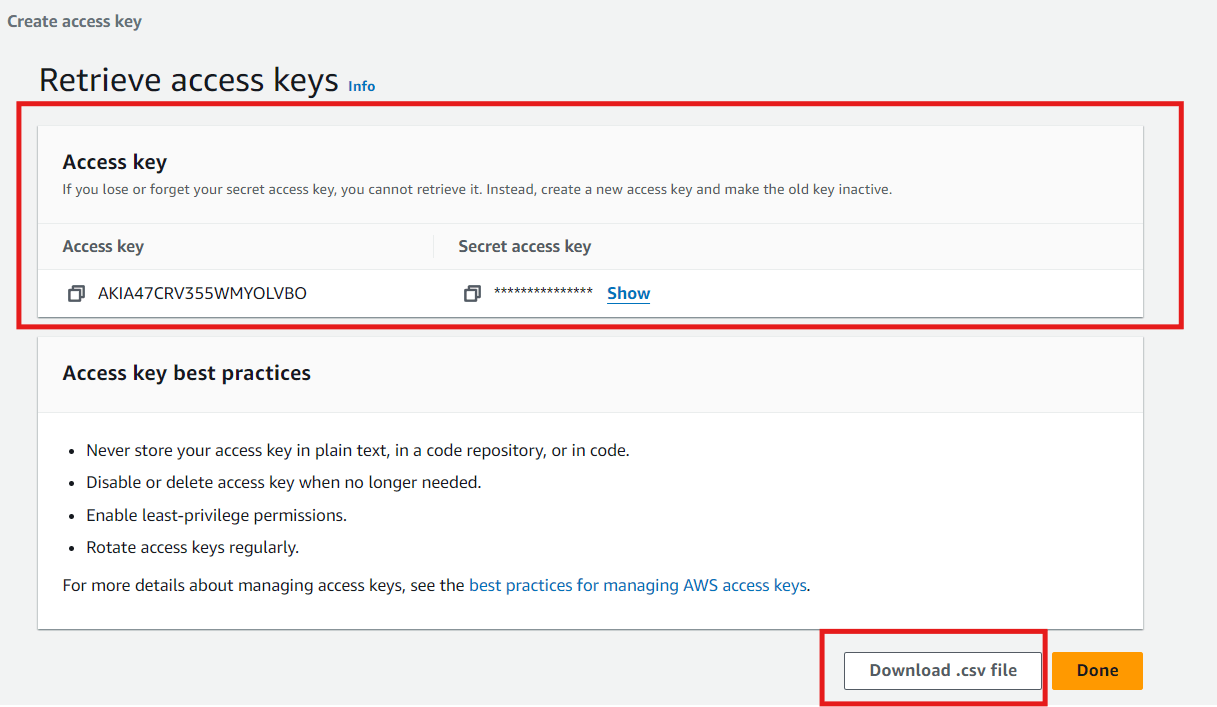
Download the .csv file and store your Access Key and Secret Access Key. These keys will allow you to access your AWS account. Make sure you keep your keys secure and do not share them with anyone.
STEP 3: EC2 Instance Setup and Configure AWS CLI:
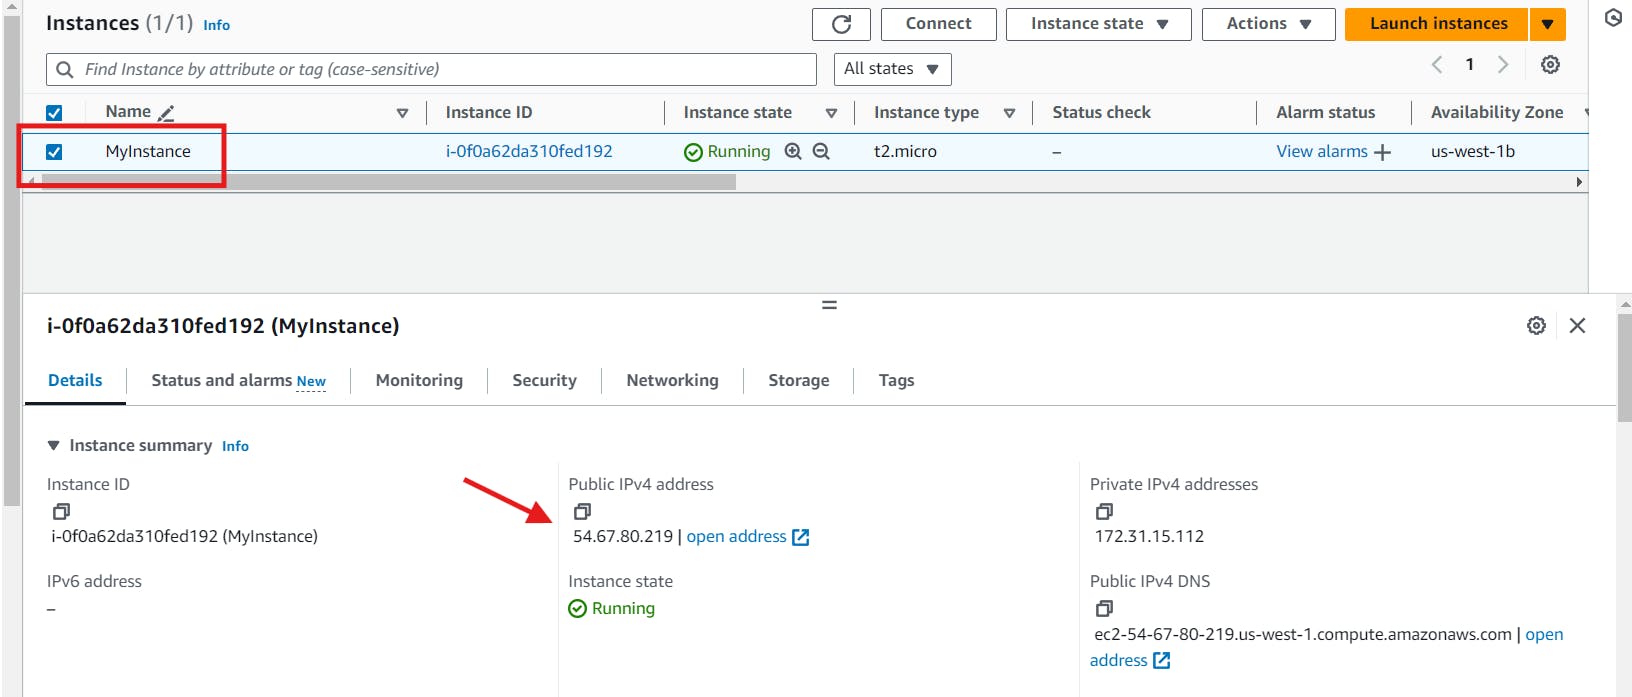
Head over to your running instance and copy the public IP address.

Use the terminal of your choice to log in to your instance using the public IP.
ssh -i Downloads/MyInstance-key.pem ubuntu@54.67.80.219
Replace your key path and IP address with the ones from the code above, where "Downloads/MyInstance-key.pem" represents your key path.
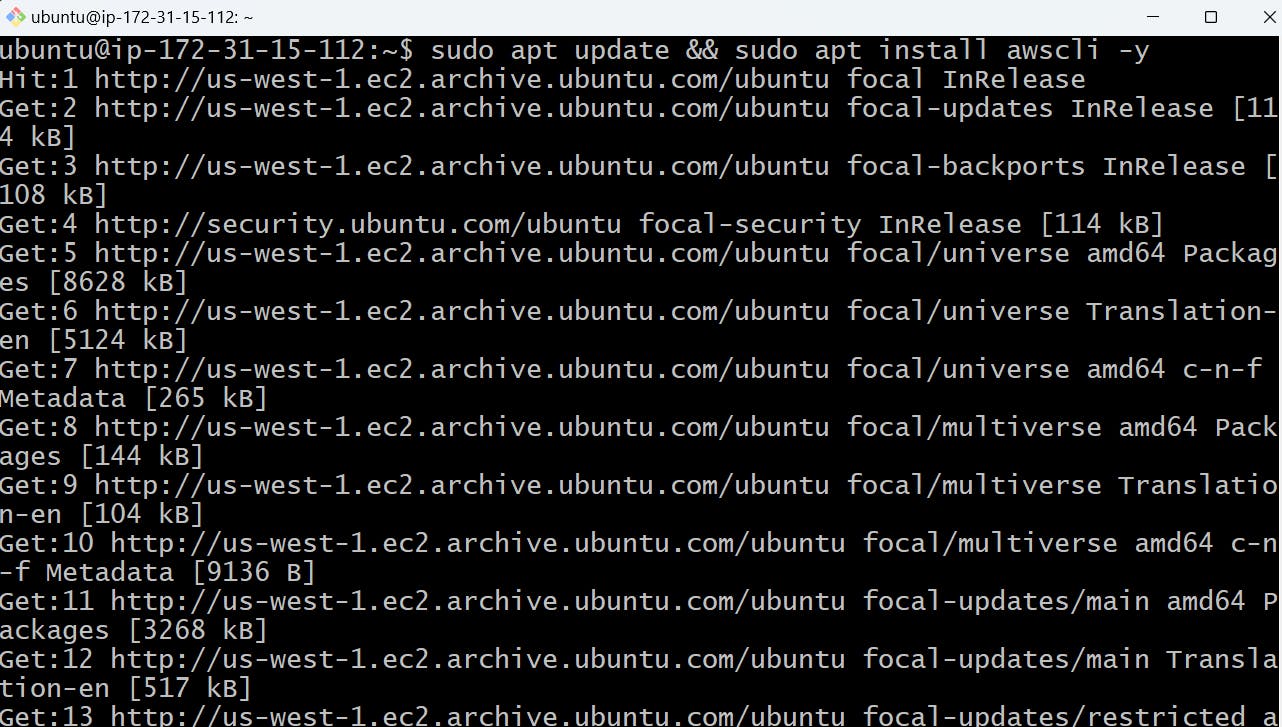
sudo apt update && sudo apt install awscli -y
Run the above command to install AWS Command Line Interface (CLI).

Now, enter your AWS Access key and AWS Secret Access key that you downloaded when creating the access key for your IAM user.
STEP 4: Write AWS Resource Tracker Script
Download jq, a lightweight and flexible command-line JSON processor used in the script using the code below.
sudo apt install jq -y


Create the script and give permission to execute it.
#!/bin/bash

########################
# Author: Phoyangsa
# Date: 25-04-2024
# Version: v1
#
# This Script will report the AWS resource usage
########################


# List s3 Buckets
echo "Print List of s3 buckets"
aws s3 ls

# List EC2 Instances
echo "Print list of ec2 instances
aws ec2 describe-instances | jq '.Reservations[].Instances[].InstanceId'

# list lambda
echo "Print list of lambda functions"
aws lambda list-functions

# list IAM Users
echo "Print list of iam users"
aws iam list-users | jq '.Users[].UserName'
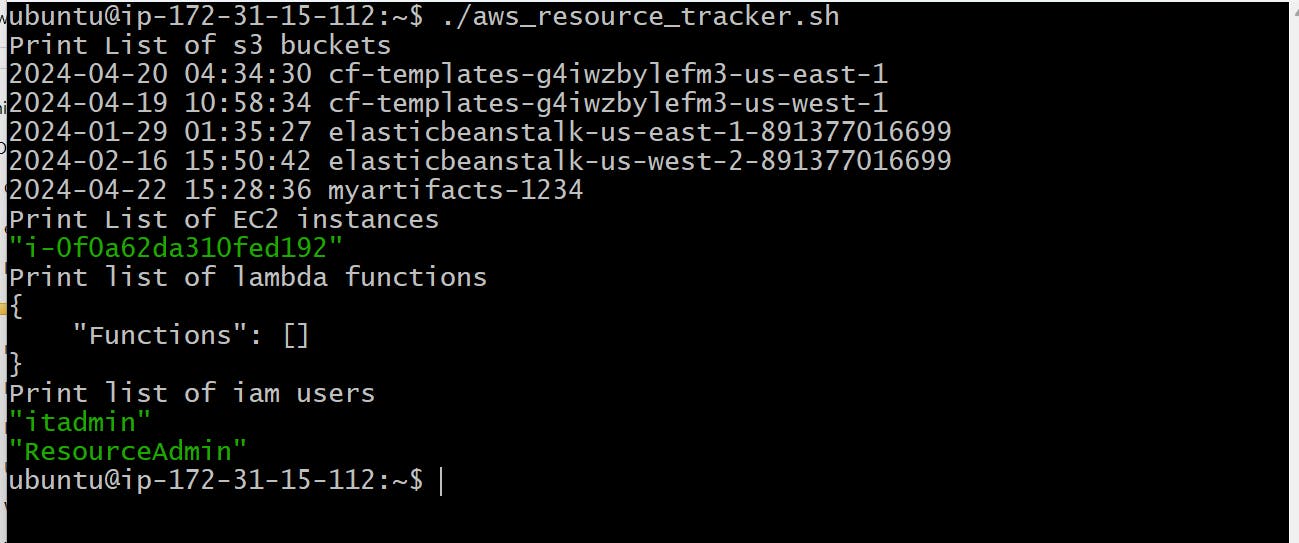
After execution, the output will resemble the image above. The lambda functions section is empty because there are currently no lambda functions available.
STEP 5: Schedule Script Execution
It's time to schedule our script's execution. This will ensure that the script runs automatically every day at 6 pm without manual intervention. We will achieve this by setting up a cronjob and directing the report to a file we will create (the path to my log file is /home/ubuntu/aws_report.log).
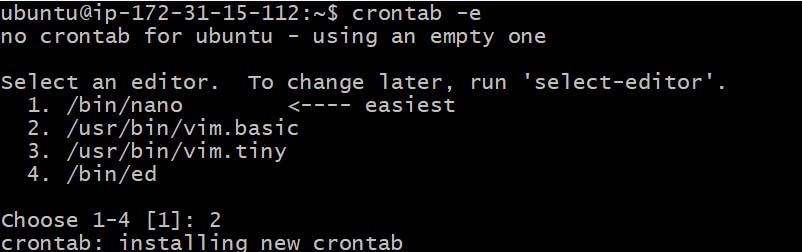
crontab -e
Upon entering the commandcrontab -e, you will be prompted to select an editor. Choose the editor you prefer and proceed.
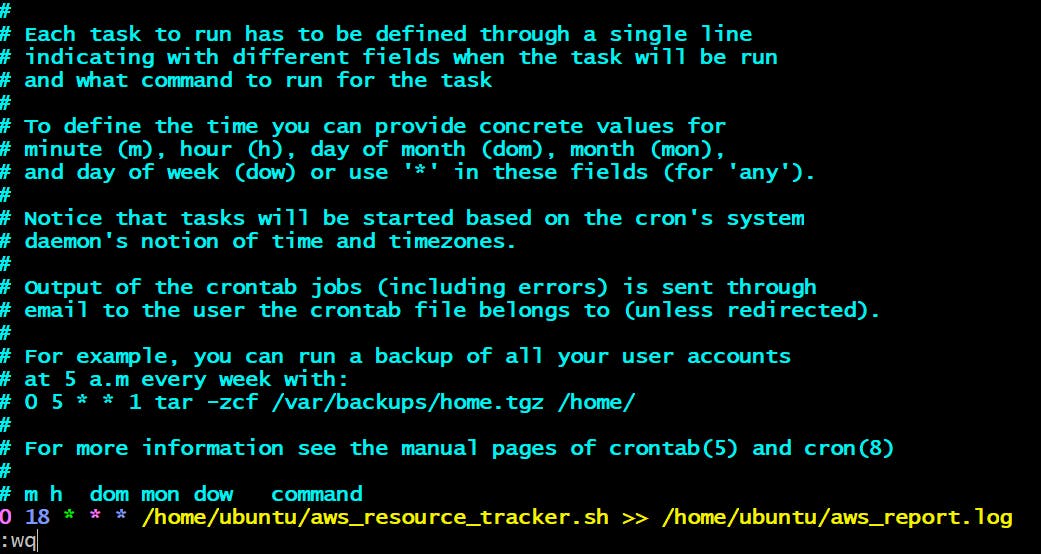
Insert0 18 * * * /home/ubuntu/aws_resource_tracker.sh >> /home/ubuntu/aws_report.logat the bottom of the file.\
Now, the script will run daily at 6 pm and save the report to the file located at /home/ubuntu/aws_report.log.
CONCLUSION
The automated AWS Resource Usage Reporting project provides a streamlined way for users to gather detailed information about their AWS assets, enabling them to conduct audits, manage inventory, optimize resources, and assess security. By following the outlined steps to provision an EC2 instance, create an IAM user, set up and configure AWS CLI, write the AWS Resource Tracker script, and schedule script execution, users can automate the process of tracking various resources like S3 buckets, EC2 instances, Lambda functions, and IAM users. This project simplifies resource monitoring and enhances operational efficiency for AWS users.